When most people hear the word vinegar, they automatically think of the harsh smelling liquid that burns the back of your throat. We’ll I’m here to tell you that homemade vinegar is far from that. If done right, you will be left with some smooth tasting stuff that makes killer sauces and will make just about any dish shine like never before. And since this recipe lets you play around with beer, it’s all that much better!
You can use this vinegar to make barbecue sauces, pickles and to brighten the flavors of your favorite dishes.
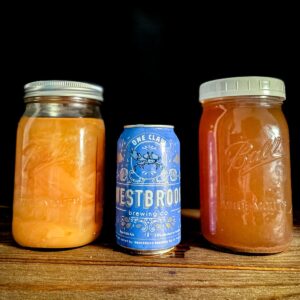
Making Beer Vinegar (4-6 Weeks)
You want to start with a raw vinegar base. I like raw organic apple cider vinegar (most stores sell the Bragg’s brand). Raw and unfiltered vinegar has the “Mother” floating around in them which enables you to use them to make other vinegar’s.
Cooks Notes
Save a cup of your new homemade vinegar for your next batch. The beer flavor will be much more concentrated and that’s essentially what you’re after. Keep playing around with different types of beer and I’m sure you’ll be surprised at some of the cool flavors that you create.
Homemade Beer Vinegar
Equipment
- 1 Wide Mouth Mason Jar
- Cheese Cloth or Coffee Filter
- 1 Rubber band
Ingredients
- 1 Cup Raw Unfiltered Apple Cider Vinegar
- 3 Cups Beer (Pick your Favorite)
Instructions
- Pour the vinegar and beer into your mason jar.
- Mix well.
- Cover the top of the mason jar with a couple layers of cheese cloth or a coffee filter and secure with the rubber band.
- Place the jar in a dark and a decently cool space for roughly 4-6 weeks.
- Start tasting at the 4 week mark and let sit as long as needed to get the flavor you’re after. The longer it sits the better. Once the flavor is where you want it, simply place a lid over the top
NOTES
- Use raw vinegar only. Raw, unfiltered apple cider vinegar gives the batch the mother it needs to turn the beer into vinegar.
- Cover it with a cloth. Use cheesecloth or a coffee filter with a rubber band to let the jar breathe while it ferments.
- Keep it dark and cool. Set the jar in a darker, fairly cool spot for about 4 to 6 weeks while the vinegar develops.
- Start tasting at 4 weeks. Let it go longer for a sharper flavor.
- Save some for next time. Hold back about 1 cup from the finished batch to start the next one with a stronger beer flavor.
- Use any beer you like. Different beers will change the final flavor, so lighter and darker styles will give you different results.
Nutrition
Nutrition information is automatically calculated, so should only be used as an approximation. Nutrition is per serving.